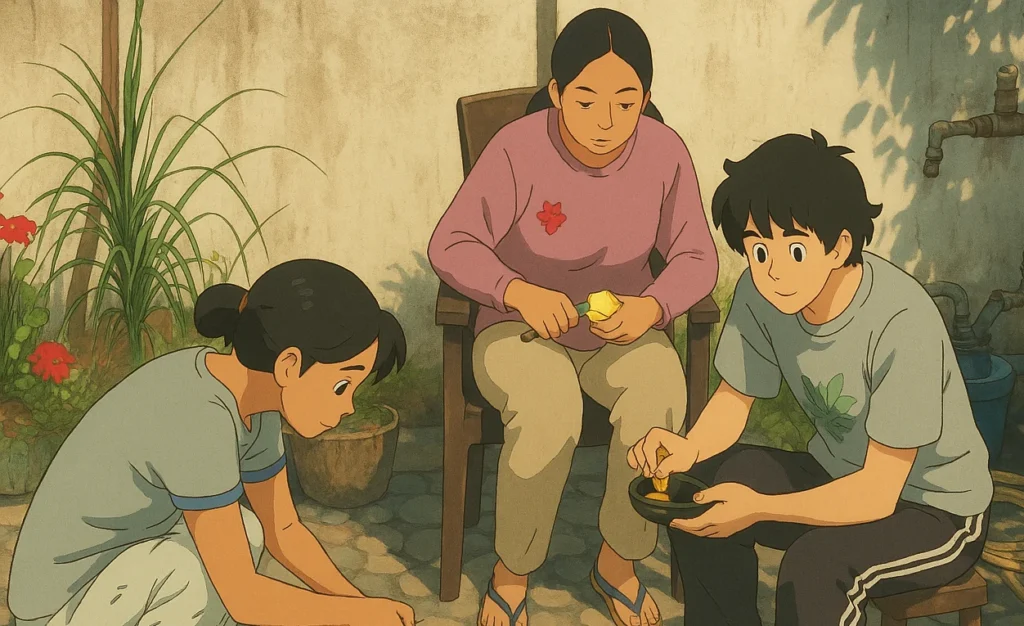
How to Make STUDIO GHIBLI image Free ?
Studio Ghibli art films, like Spirited Away and Howl’s Moving Castle, transport viewers to worlds where nature and fantasy collide. Their art style—soft, nostalgic, and bursting with life—has inspired countless artists. The good news? You don’t need expensive software to recreate this magic. This guide dives into free tools, actionable techniques, and insider tips to help you design Studio Ghibli-inspired artwork that feels authentic and enchanting.

Why Studio Ghibli Art Style Resonates Deeply
Studio Ghibli art visuals aren’t just pretty—they tell stories. Hayao Miyazaki’s team masterfully balances:
- Nature’s Imperfection: Trees lean, clouds drift unevenly, and hills roll organically.
- Emotional Color Palettes: Soft pastels evoke calm, while vibrant greens and blues spark wonder.
- Subtle Movement: Gentle ripples in water, fluttering leaves, and drifting smoke add life.
- Nostalgic Textures: Watercolor skies, pencil-like strokes, and grainy overlays mimic traditional art.
These elements create a sense of warmth and familiarity, making viewers feel like they’ve stepped into a cherished memory.
Free Tools to Channel Your Inner Studio Ghibli Artist
1. Canva (Free Tier)
Perfect for beginners, Canva offers:
- Pre-Designed Templates: Start with landscape or fantasy-themed frames.
- Watercolor Overlays: Search “watercolor texture” in the Elements tab for dreamy backgrounds.
- Pro Tip: Use the “Transparency” slider to soften harsh edges.
2. Krita (Open-Source Software)
A powerhouse for digital painting:
- Custom Brushes: Mimic Ghibli’s organic strokes with the “Wet Bristles” or “Texture Dab” brushes.
- Animation Tools: Create subtle motion (e.g., flickering fireflies) using Krita’s timeline feature.
3. GIMP (Free Image Editor)
Ideal for refining details:
- Layer Blending Modes: Use “Overlay” for glowing lights or “Multiply” for shadows.
- Filters: The “Oilify” filter adds a hand-painted texture.
4. Artbreeder (Free Account)
Merge landscapes to create surreal scenes:
- Upload a forest photo and blend it with a cloud image for a Laputa-style sky island.
5. Unsplash & Texture Haven (Free Resources)
Download:
- Watercolor Textures: For backgrounds.
- Nature Photos: Use as references for trees, rivers, or flowers.
Step-by-Step Guide to Crafting Your Studio Ghibli Art Masterpiece
Step 1: Brainstorm a Story-Driven Concept
Studio Ghibli art thrives on narrative Ask:
- Who lives here? A lonely wizard, a curious child, or forest spirits?
- What’s the mood? Peaceful, mysterious, or adventurous?
Example: A hidden village where clockwork creatures tend to glowing gardens.
Step 2: Sketch Organic Shapes
- Use Krita’s Pencil Tool: Draw wobbly hills, asymmetrical trees, and clouds that look like cotton candy.
- Avoid Straight Lines: Ghibli’s worlds feel alive because nothing is too perfect.
Step 3: Build a Nostalgic Color Palette
- Start with Base Colors: Soft blues for skies, muted greens for grass.
- Add Contrast: Use warm yellows (sunlight) or deep purples (shadows) to guide the viewer’s eye.
- Pro Tip: Study My Neighbor Totoro’s palette—notice how greens vary from sage to moss.
Step 4: Layer Textures for Depth
- Import a watercolor texture from Unsplash.
- Set the layer to “Overlay” in GIMP.
- Adjust opacity to 30–40% for a subtle, hand-painted feel.
Step 5: Bring Scenes to Life with Nature
- Rivers: Use Krita’s “Smudge” tool to create gentle ripples.
- Trees: Cluster 3–4 shades of green for fluffy foliage.
- Small Details: Add wildflowers, stone paths, or a tiny red bridge (a Ghibli staple!).
Step 6: Create Atmosphere with Light
- Golden Hour Glow: Paint soft yellow circles (low opacity) around light sources.
- Layer Effects: In GIMP, use “Gradient Map” to blend warm and cool tones.
Step 7: Design Whimsical Characters (Optional)
- Keep It Simple: Sketch round faces, large expressive eyes, and petite bodies.
- Outfit Ideas: Flowy dresses, aprons, or quirky hats add charm.
Step 8: Finalize with Motion and Mood
- Motion Blur: Apply to drifting clouds or falling leaves.
- Vignette Effect: Darken edges slightly to focus attention on the scene’s heart.
5 Pro Tips for Authenticity Studio Ghibli
- Steal Like an Artist: Trace a Ghibli Art frame (for practice only!) to understand linework and composition.
- Limit Your Palette: Use 4–5 primary colors to avoid visual chaos.
- Zoom Out: Ghibli scenes look simple from afar but reveal details up close.
- Add Weather: Mist, rain, or falling cherry blossoms enhance mood.
- Break Rules: Let a tree overlap a house or a cloud “hide” part of the sun—it adds playfulness.
Learn from Studio Ghibli Greatest Scenes
- Howl’s Moving Castle: Study the flower field scene—notice how pinks and greens complement each other.
- Princess Mononoke: Analyze the forest spirit’s glow—a mix of soft blues and stark whites.
- Ponyo: Recreate underwater hues by layering turquoise, coral, and pearl white.
FAQs: Solve Common Challenges
Q: How do I avoid making my art look flat?
A: Use shadows! Add darker shades under trees, rocks, or buildings.
Q: Can I use AI tools ethically?
A: Yes. Use Artbreeder for inspiration, but always add hand-drawn details to maintain originality.
Q: My colors look too digital. Help!
A: Overlay a paper texture and reduce saturation by 10–15%.
Final Thoughts: Embrace the Journey
Creating Studio Ghibli art -style art is about celebrating imperfection and storytelling. Start small—sketch a single tree, a cottage, or a cloud. With free tools and patience, you’ll soon craft worlds that feel alive with magic.
Share your art with Ghibli art MagicChallenge for feedback and features!


